IoT - Temperature and Humidity Sensor hookup guide - MAE540-2017 Team 7
By Alexander Wilson, Hao Wu, James Sandrolini, Vaibhav Jhawar
Narrative of the application
Temperature and humidity sensors can be used in vast area of applications. One application is weather stations around the globe, where the sensor can gather both temperature and humidity of the location.
In this application, we see how close the sensor would get to the actual data from local weather sources, like the Weather Channel Application. The temperature and humidity sensor that was chosen for this experiment is the Si7021, which is available from Sparkfun.
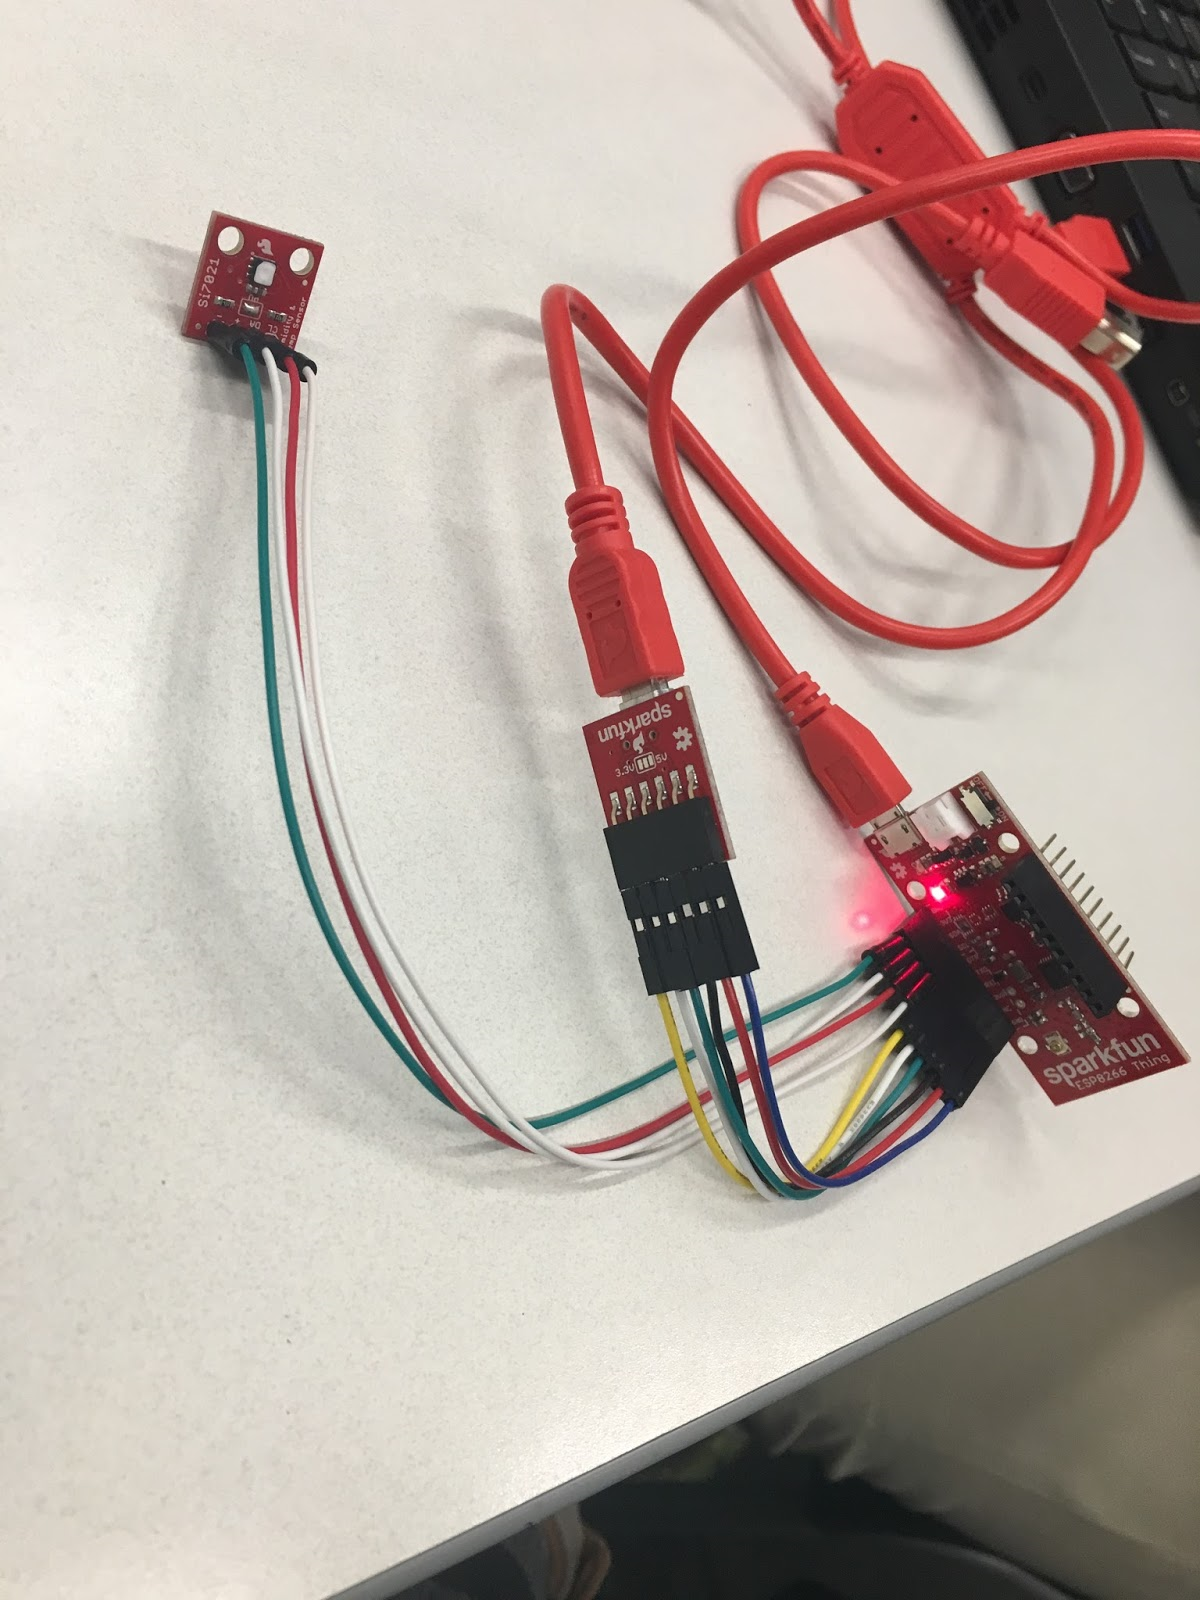
For this project, you will need a Sparkfun Si7021, The SparkFun ESP8266 Thing board, FTDI Basic -3.3V, SparkFun Cerberus USB Cable, Jumper Wires, a Breadboard and an Arduino stackable header. You will also need an Android/Apple smartphone to use Blynk app and a computer to compile the code.
Introduction to the sensor
The Sparkfun Si7021 is a humidity and temperature sensor. The sensor operates at 3.3 volts and has a built in analog to digital converter, signal processing, and internally stored calibration data. The sensor communicates over the I2C communications bus and contains all the necessary pull up resistors integrated into the board. The sensor is very accurate and has a temperature range of -10 to 85 degrees Celsius and can be accurate within +- 0.4 degrees Celsius. The humidity rang is from 0% to 80% relative humidity and is accurate within +- 3%. Power consumption of the sensor is very low, with a current draw of 15 micro amps while active and only 60 Nano amps in standby. The sensor is designed for dry applications and should not be submerged in liquids.
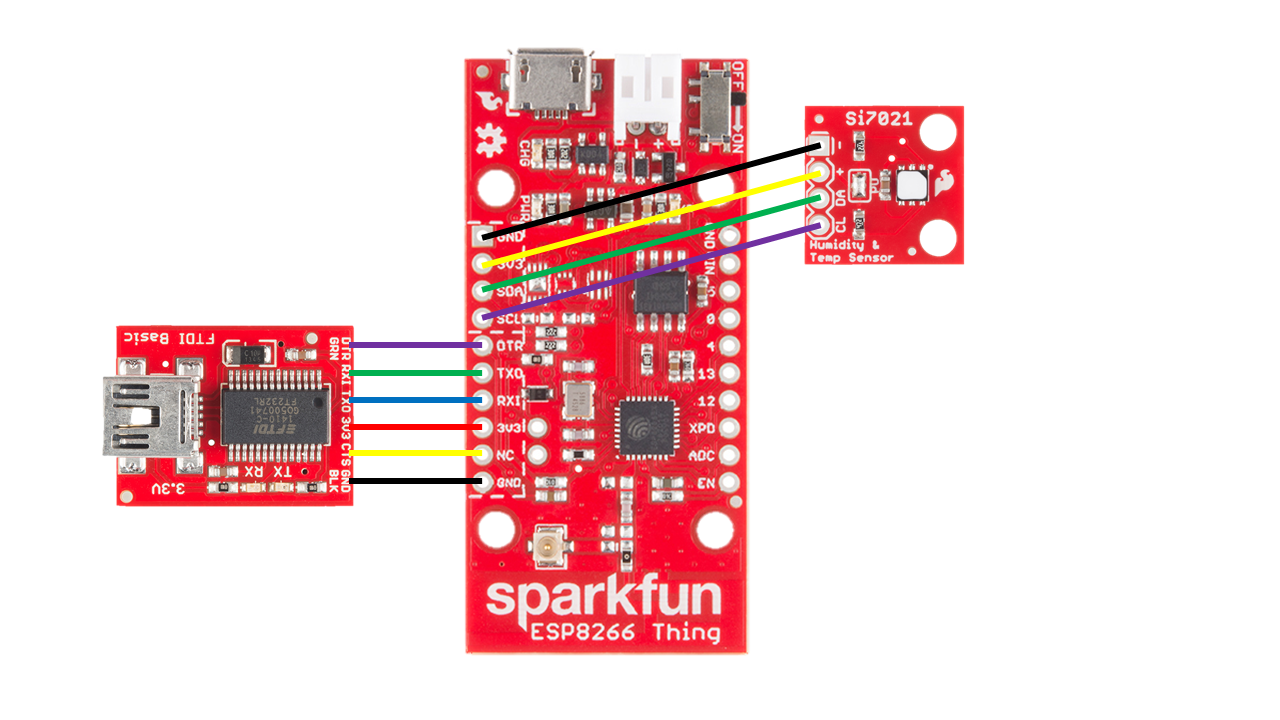
Schematic of the hookup
The pressure sensor (Si7021) has four pins:
- “GND” (ground)
- “3V3” (3.3V power)
- DA (signal - data), and
- CL (signal - clock).
You need to connect these wires to the corresponding pins on the Thing. See below pictures for how to connect both the Si7021 and FTDI Basic wifi module.
The Arduino code and related installation guide of necessary packages
Install the necessary libraries
- On your smartphone, install “Blynk” and register. It’s free.
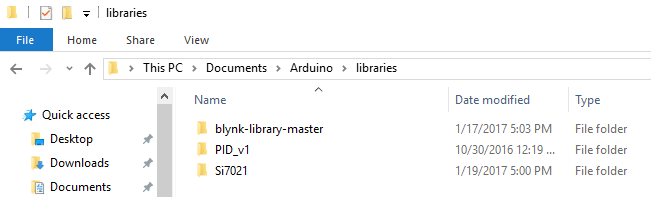
- Download the Blynk library. Unzip it and move it to: C:\Users\user_name\Documents\Arduino\libraries
- The Si7021 requires another library to be installed.
- The library can be found here https://github.com/sparkfun/Si7021_Breakout
- Unzip the downloaded folder and navigate to C:...\Si7021_Breakout-master\Si7021_Breakout-master\Libraries\Arduino
- Locate folder named Si7021 and copy over to C:\Users\user_name\Documents\Arduino\libraries
Install the blynk application
- The blynk application must be installed and set up on the mobile device. The application can be found on the Google or Apple app stores.
- After the application is installed and has an account set up, then a new project can be started by selecting the large plus icon.

- The Blynk authorization token is necessary to allow the FTDI device to communicate with the Blynk application. This token can be emailed or copied by selecting the project settings and selecting “Email All”. The authorization token will be used in the code used in the next section.
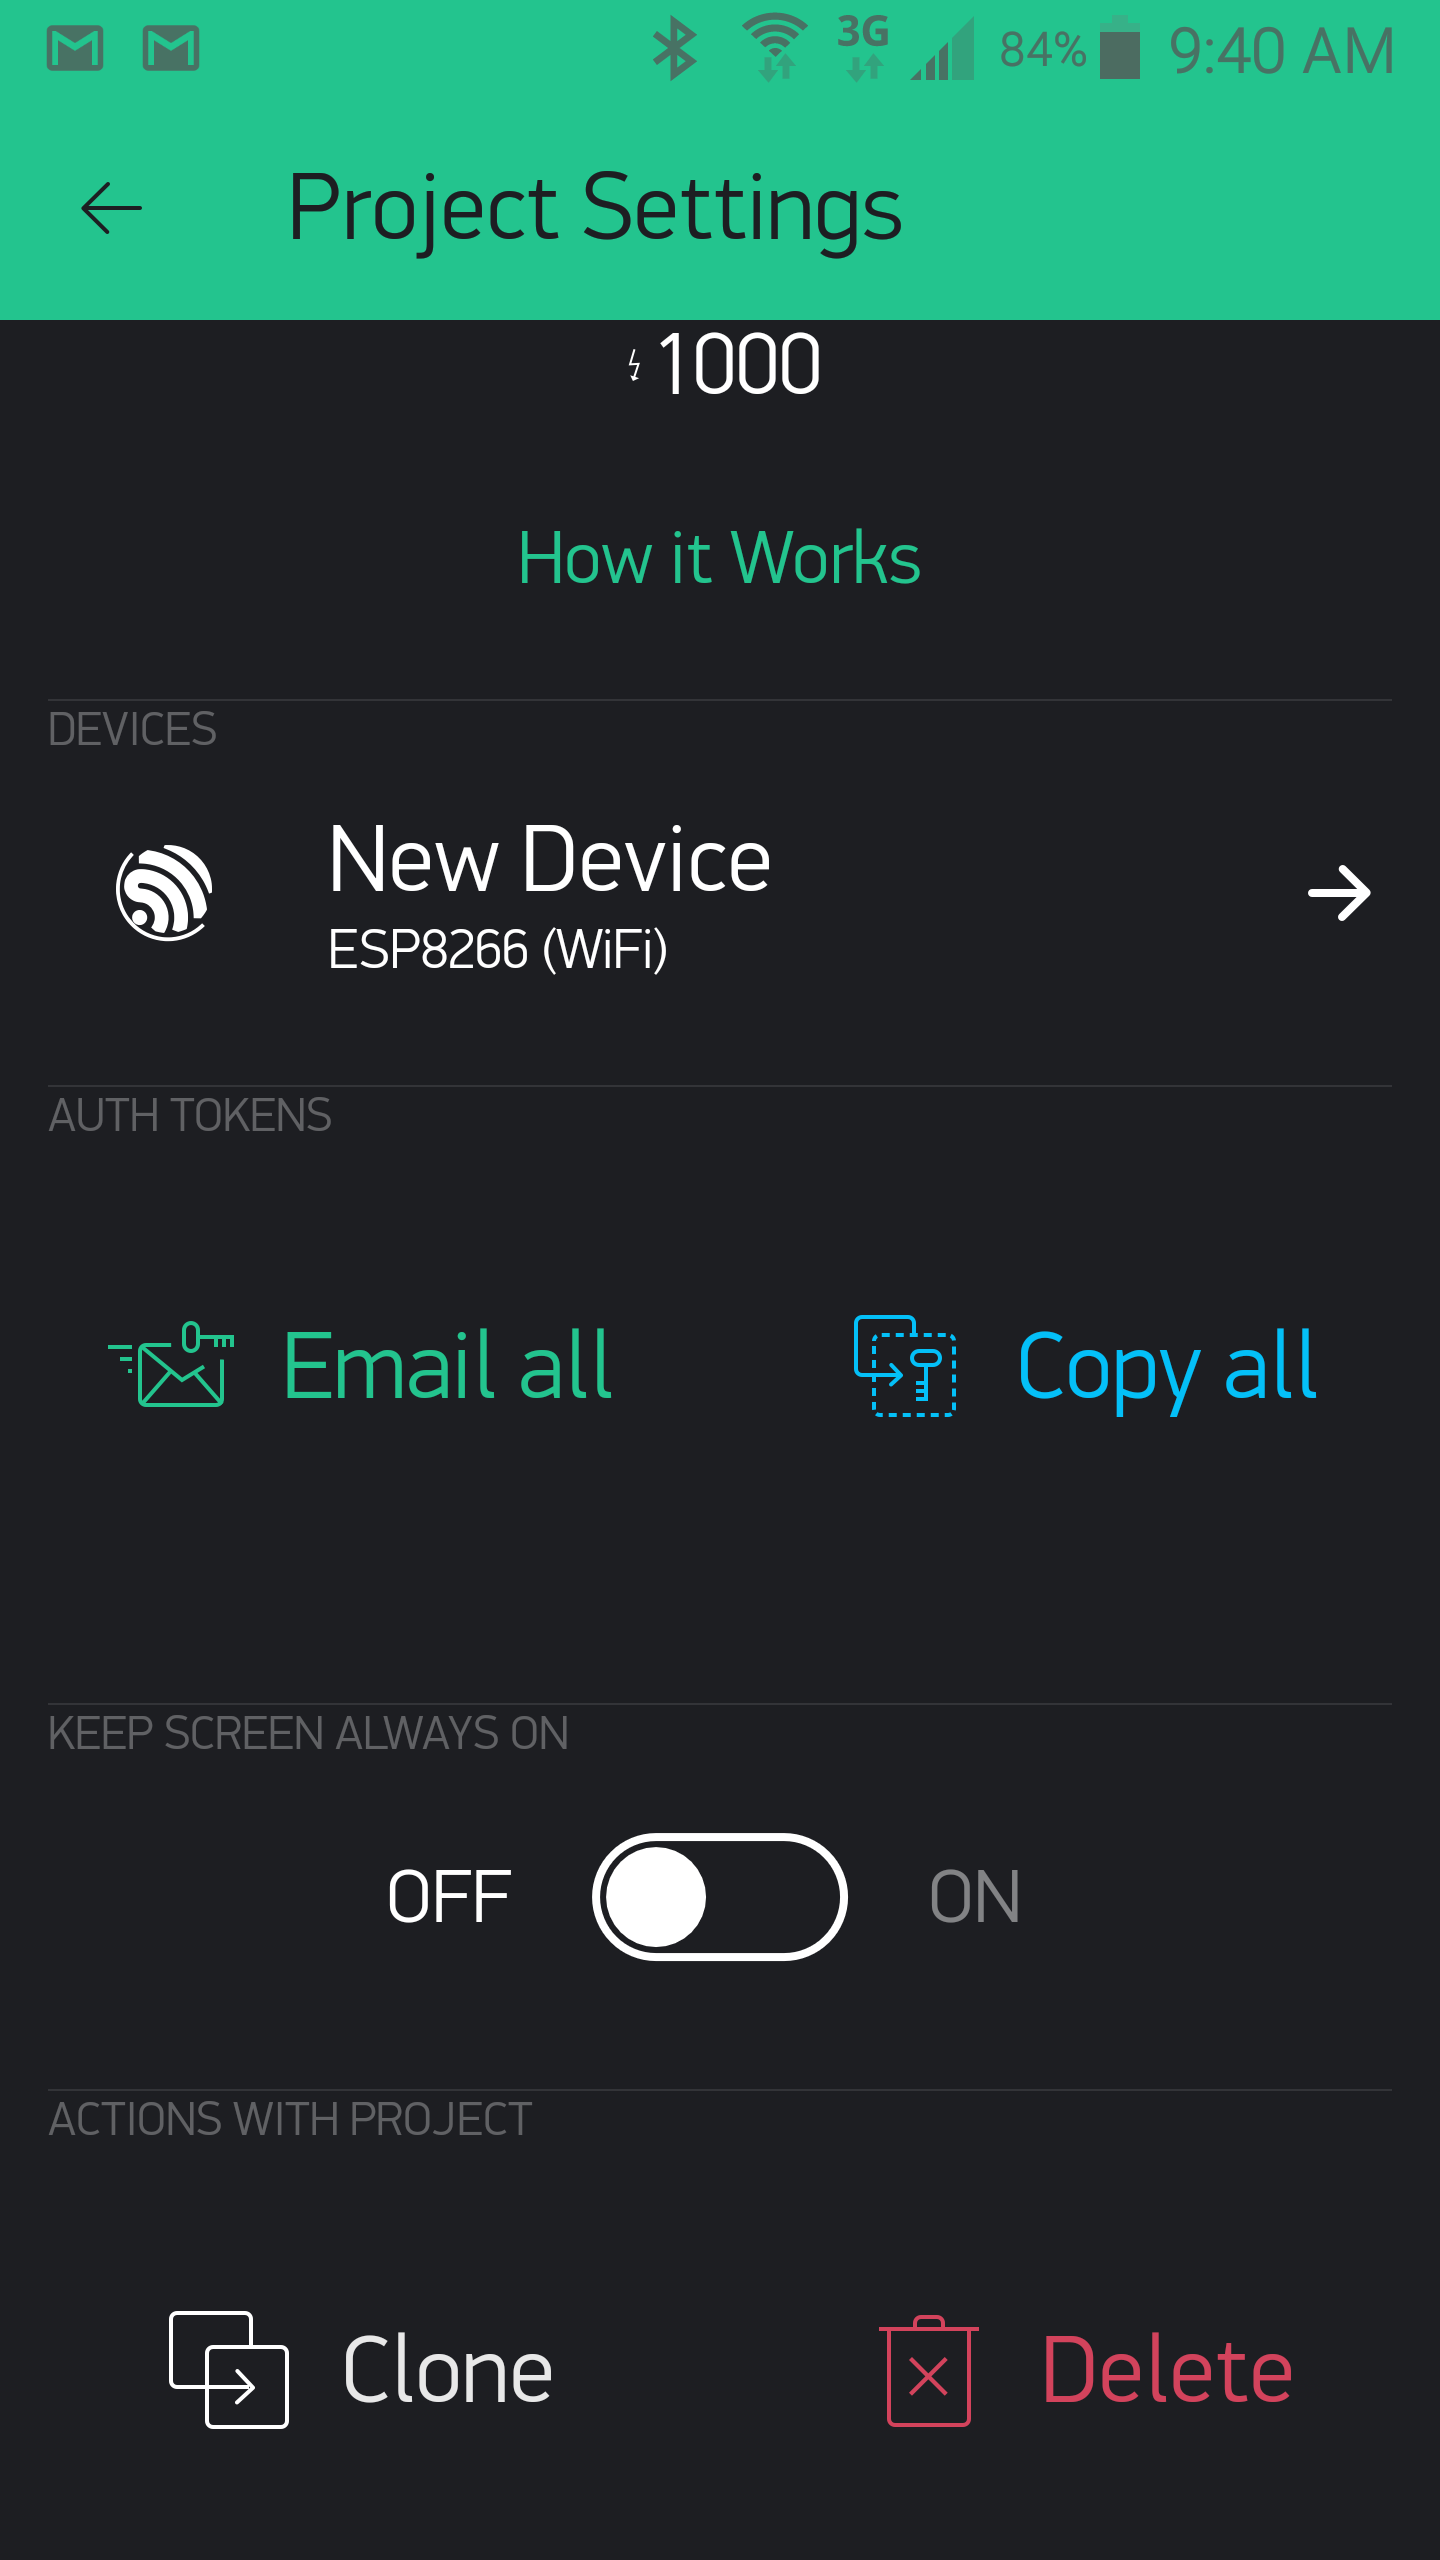
- Now it is time to setup a two virtual pins on Blynk. Tap on the background of the new project and from the menu select a “value display”.
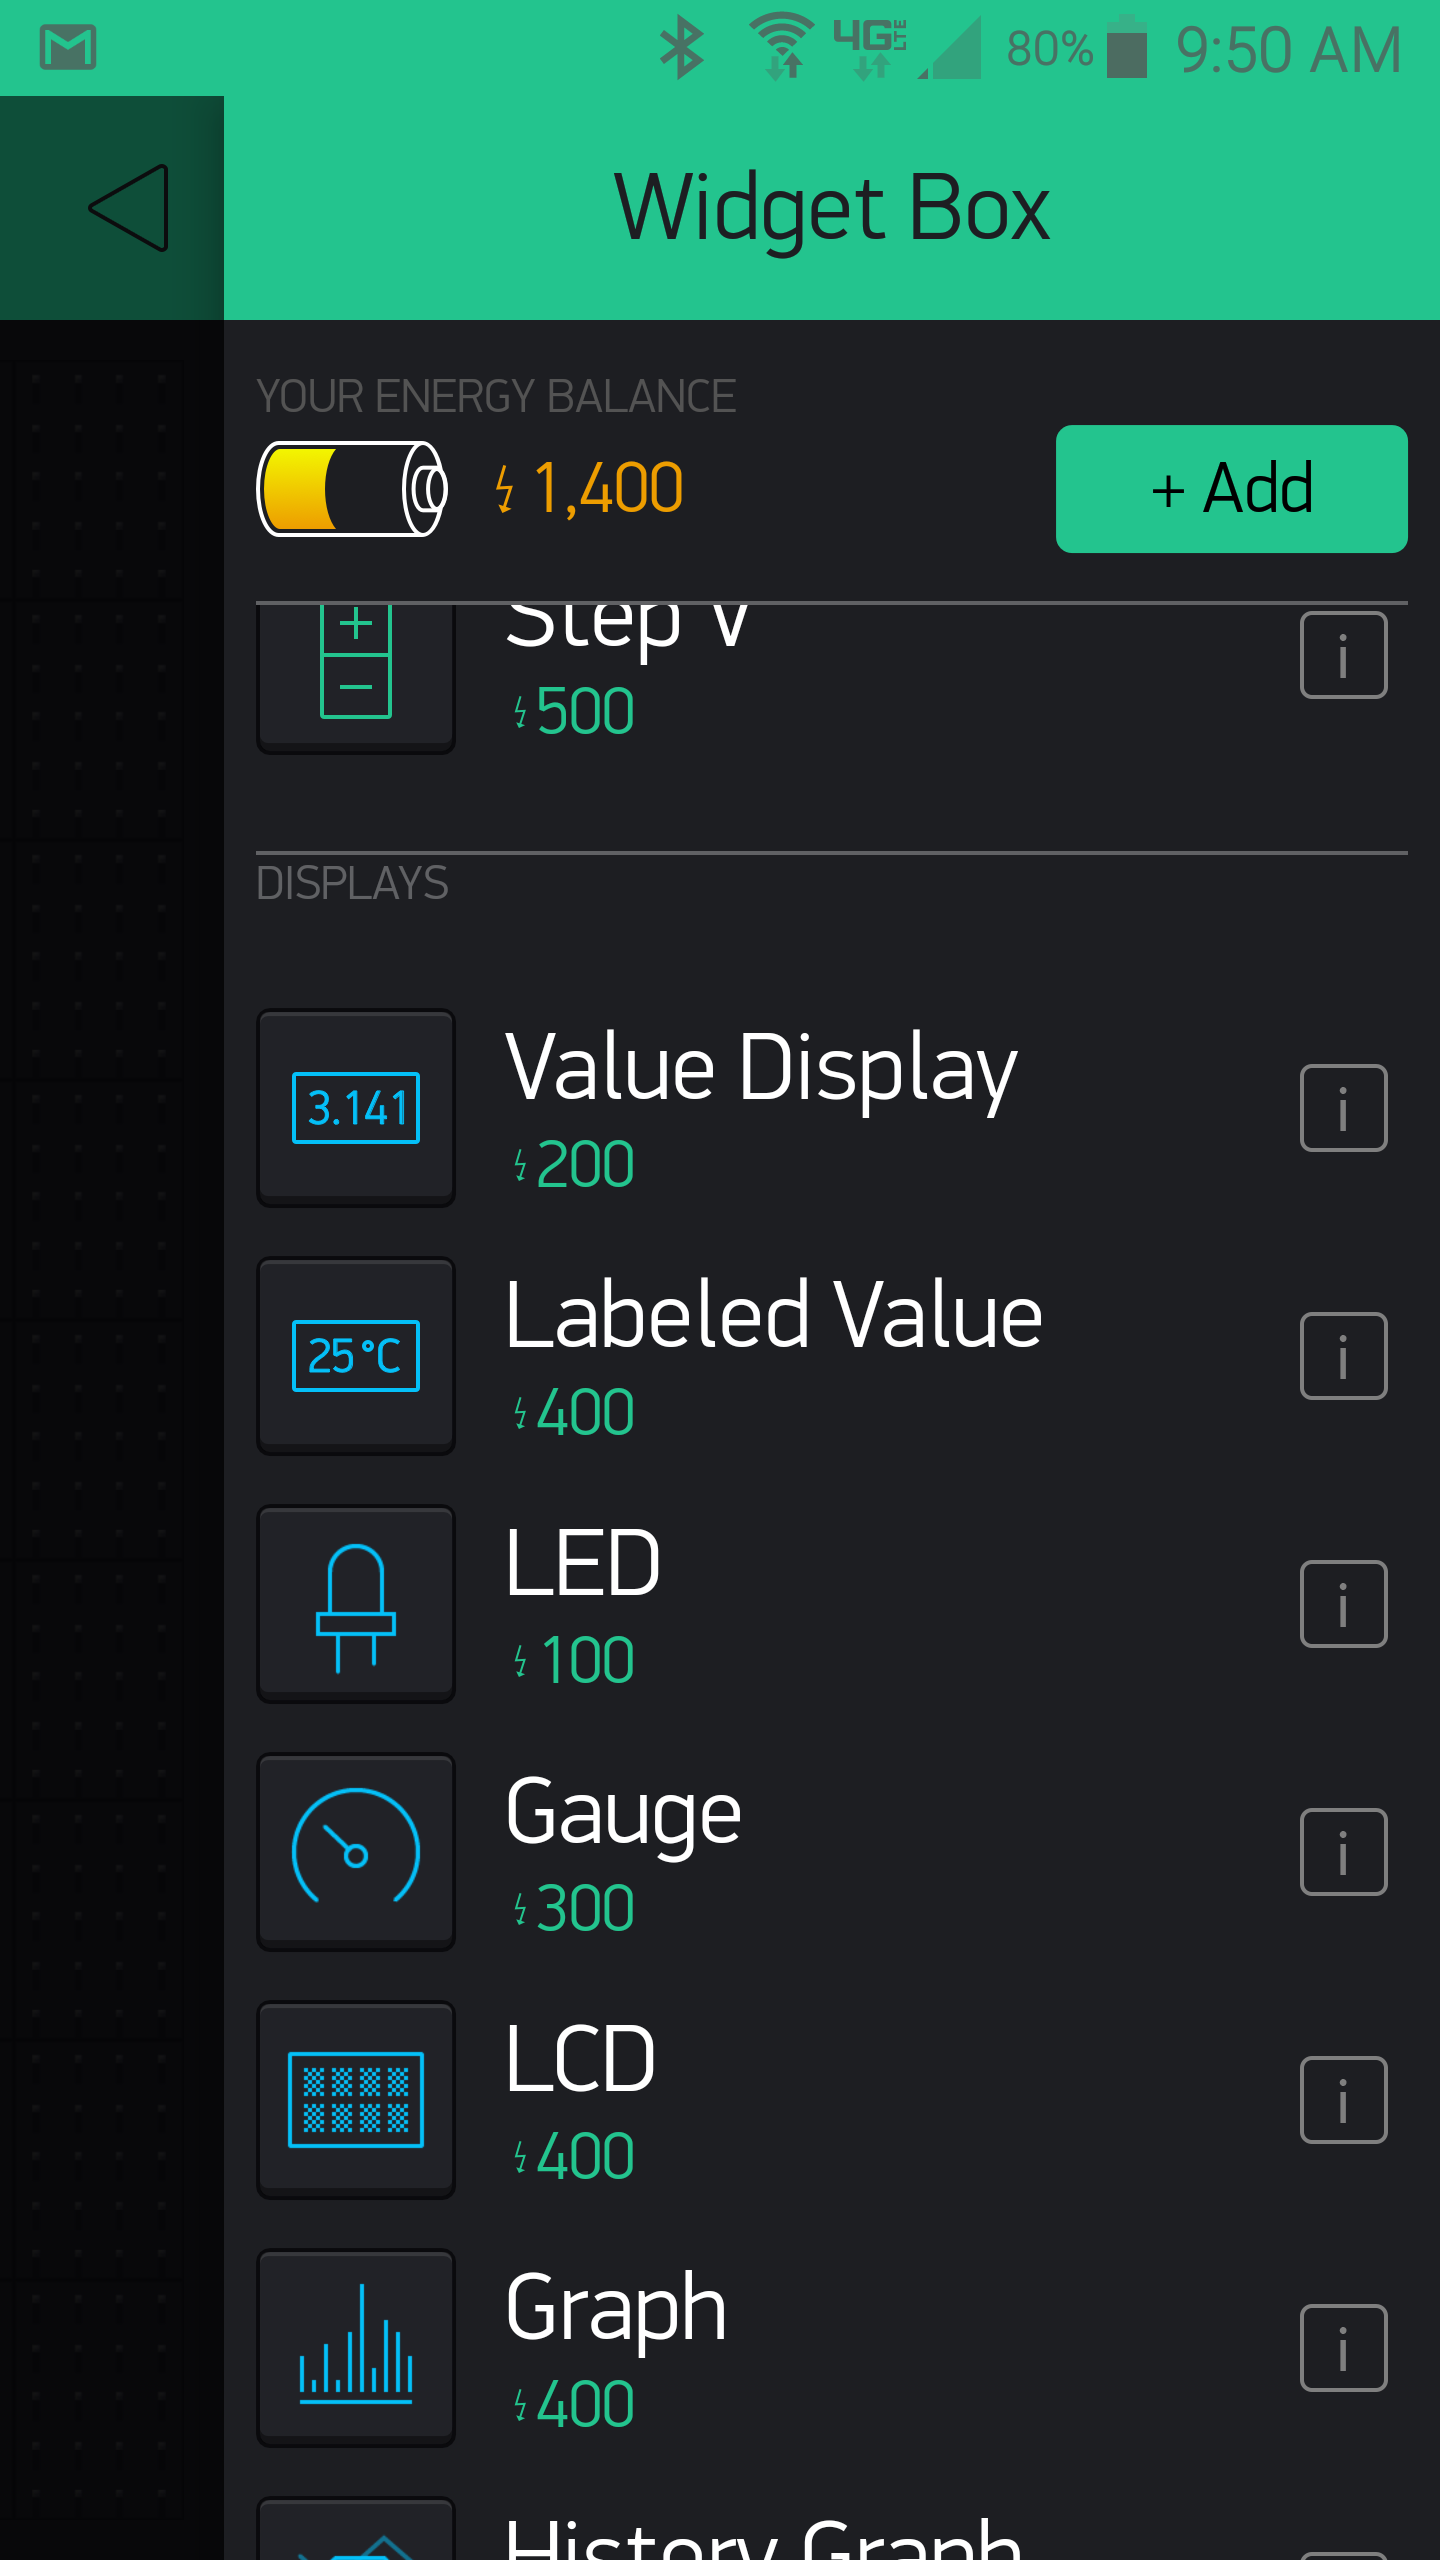
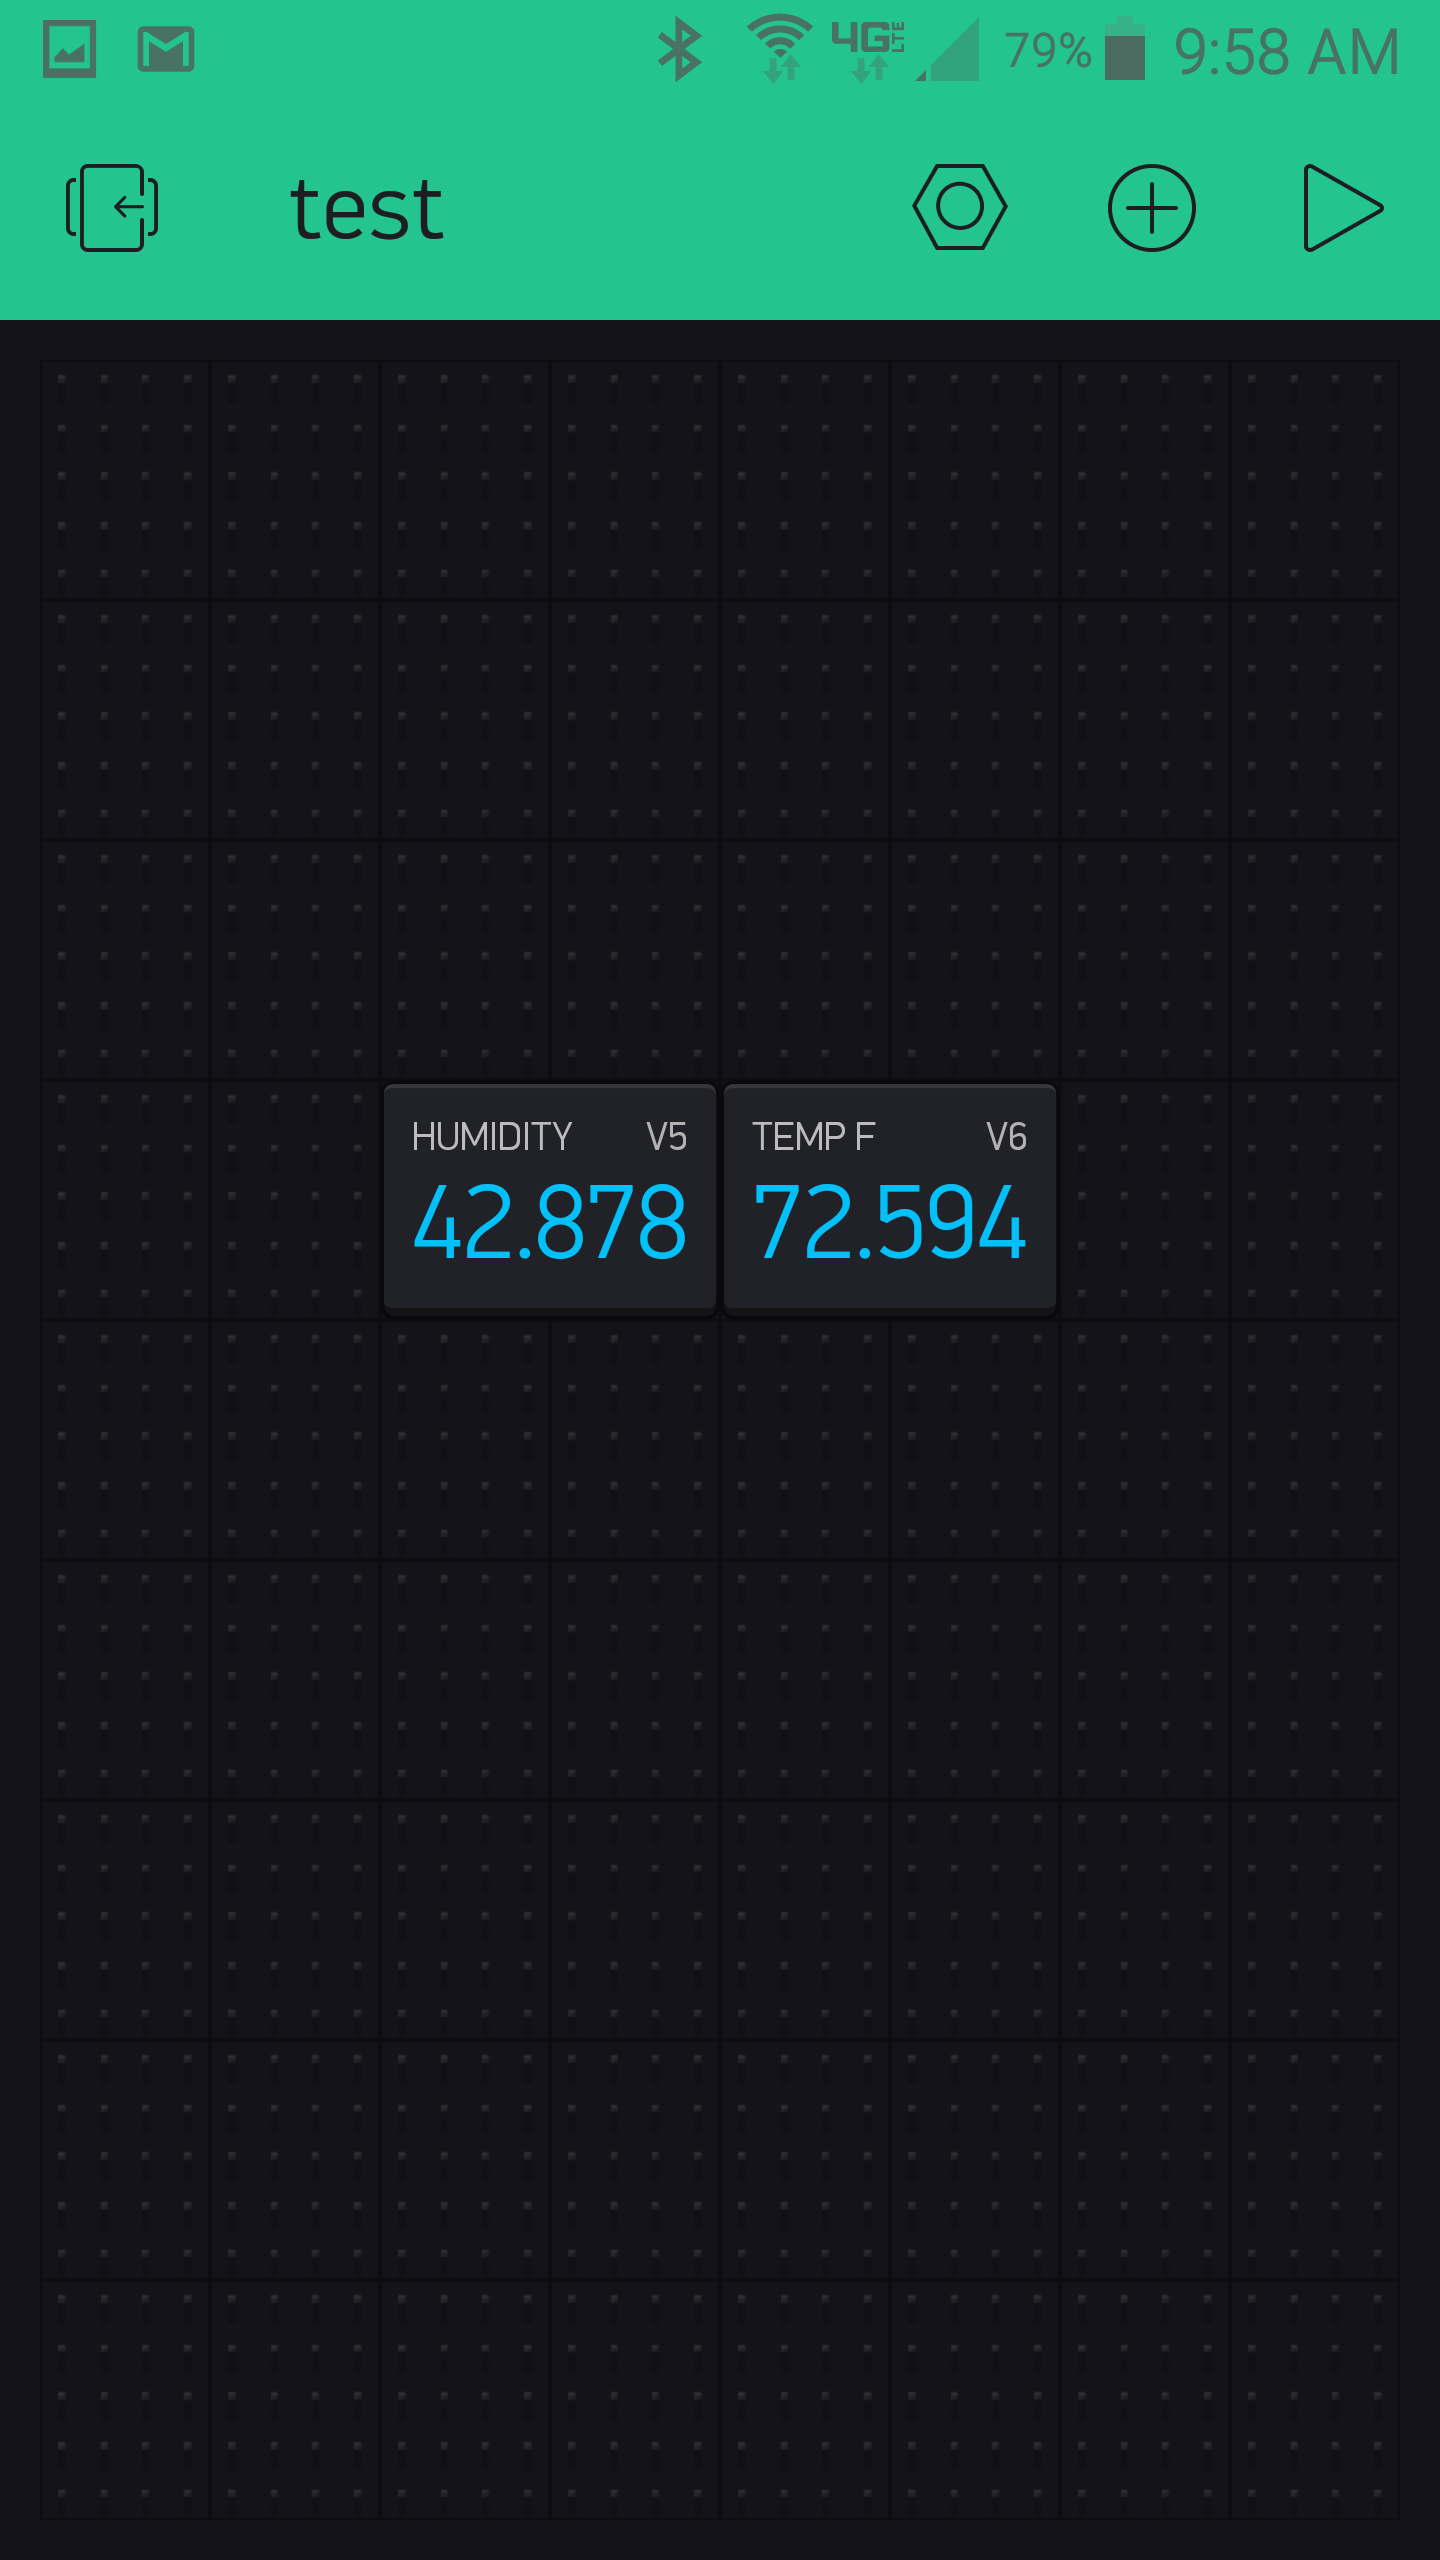
- An empty box will display on the project screen, this can be selected and setup to collect the virtual pin data. Set the pin type to virtual and select V5 as the pin number for consistency with the code supplied in this example and name the pin “humidity”.
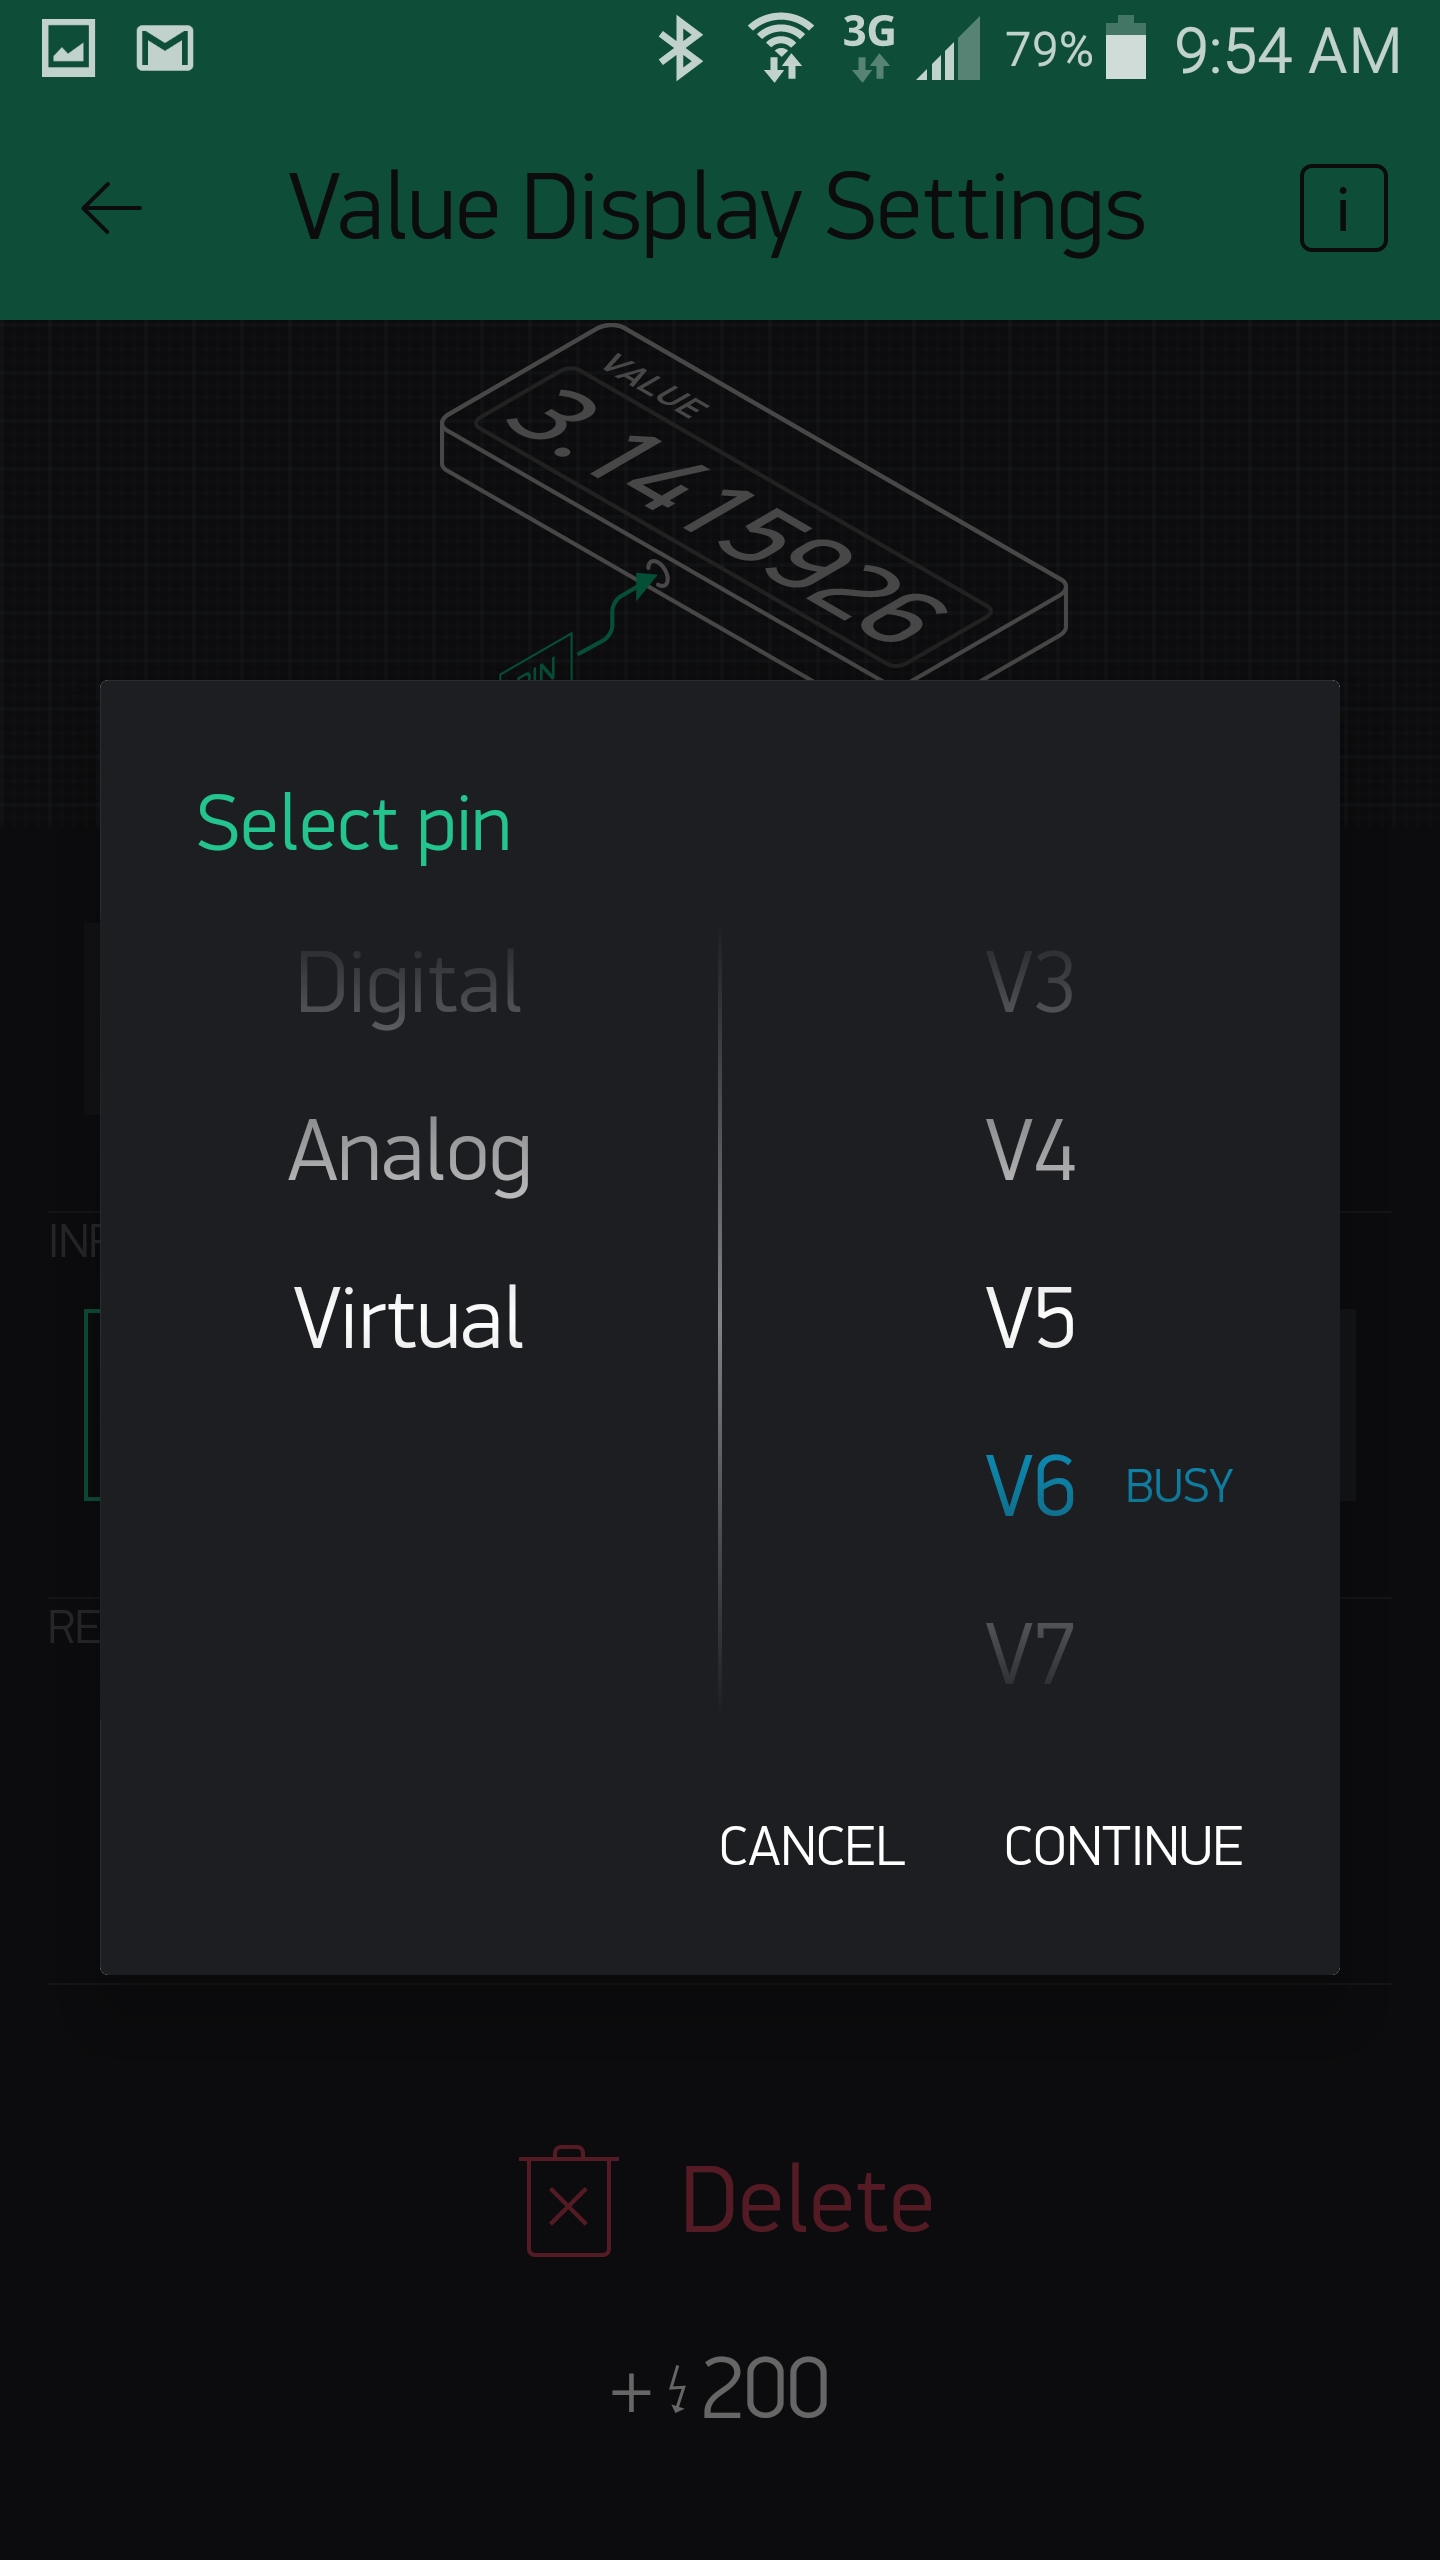
- Repeat the previous two steps except select V6 and name it “Temperature”. When finished there should be two value displays setup.
- Be sure to modify the given code with the authorization token, ssid, and password.
Arduino Code used in the experiments:
1
2
3
4
5
6
7
8
9
10
11
12
13
14
15
16
17
18
19
20
21
22
23
24
25
26
27
28
29
30
31
32
33
34
35
36
37
38
39
40
41
42
43
44
45
46
47
48
49
50
51
52
53
54
55
56
57
58
59
60
61
62
63
64
65
66
67
68
69
70
71
72
73
74
75
76
77
78
79
80
81
82
83
#include <Wire.h>
#include <ESP8266WiFi.h>
#include <BlynkSimpleEsp8266.h>
// SI7021 I2C address is 0x40(64)
#define si7021Add 0x40
// You should get Auth Token in the Blynk App project settings.
char auth[] = "***"; //***Type in your Blynk Token
// Your WiFi credentials.
// Set password to "" for open networks.
char ssid[] = "***"; //***your wifi name
char pass[] = "***"; //***and password
void setup()
{
Blynk.begin(auth, ssid, pass);
Wire.begin();
Serial.begin(115200);
Wire.beginTransmission(si7021Add);
Wire.endTransmission();
delay(300);
}
void loop()
{
Blynk.run();
unsigned int data[2];
Wire.beginTransmission(si7021Add);
//Send humidity measurement command
Wire.write(0xF5);
Wire.endTransmission();
delay(500);
Blynk.run();
// Request 2 bytes of data
Wire.requestFrom(si7021Add, 2);
// Read 2 bytes of data to get humidity
if(Wire.available() == 2)
{
data[0] = Wire.read();
data[1] = Wire.read();
}
// Convert the data
float humidity = ((data[0] * 256.0) + data[1]);
humidity = ((125 * humidity) / 65536.0) - 6;
Wire.beginTransmission(si7021Add);
// Send temperature measurement command
Wire.write(0xF3);
Wire.endTransmission();
delay(500);
Blynk.run();
// Request 2 bytes of data
Wire.requestFrom(si7021Add, 2);
// Read 2 bytes of data for temperature
if(Wire.available() == 2)
{
data[0] = Wire.read();
data[1] = Wire.read();
}
// Convert the data
float temp = ((data[0] * 256.0) + data[1]);
float celsTemp = ((175.72 * temp) / 65536.0) - 46.85;
float fahrTemp = celsTemp * 1.8 + 32;
Blynk.virtualWrite(6, fahrTemp);
Blynk.virtualWrite(5, humidity);
delay(500);
Blynk.run();
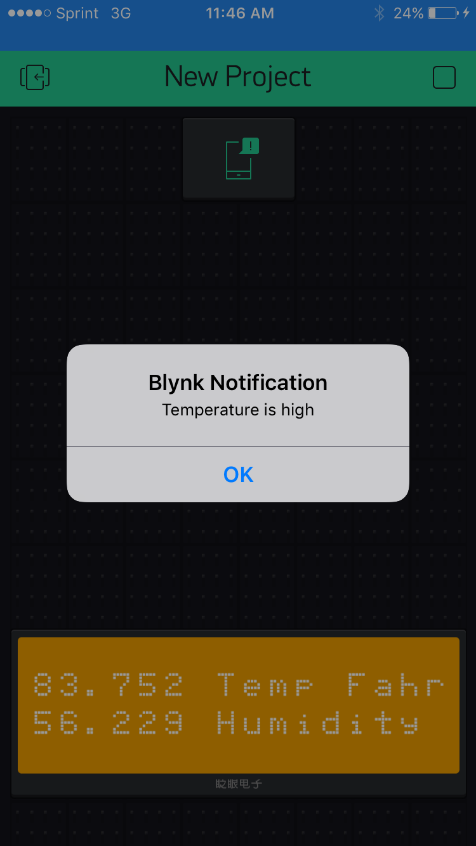
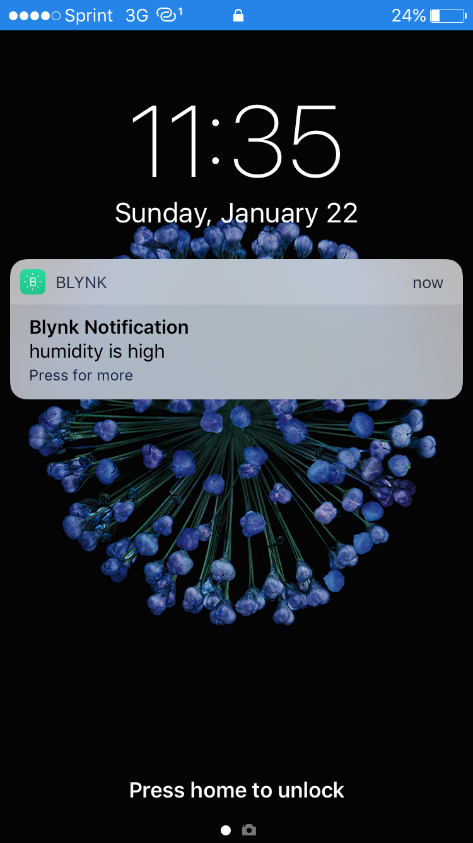
//High Limit push notification, Blynk mobile app
if(fahrTemp > 85) { Blynk.notify("Temperature is high"); }
if(humidity > 60) { Blynk.notify("Humidity is high"); }
Blynk.run();
}
Experiment and Discussion
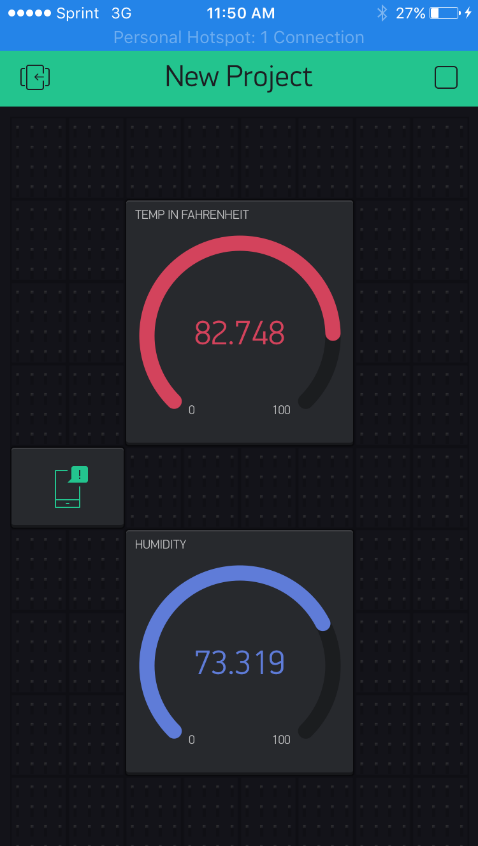
The weather sensor senses the Temperature and humidity of the atmosphere it is placed in. It can therefore be used to study the weather of atmosphere or conditioned room or even be used as a sensor for the an electronic equipment, becoming a safety device.
Experiment 1:
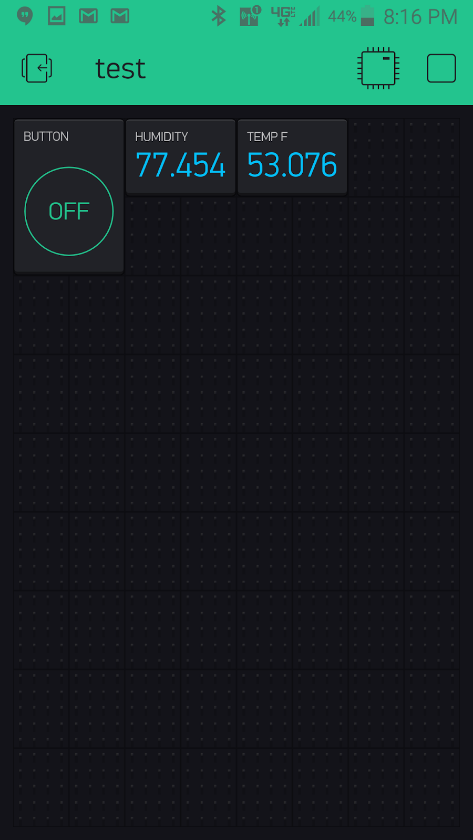
In this experiment the sensor coupled with Arduino board is run in a loop to read the values of the temperature and humidity. The values are read using the Blynk app on a smartphone. A predefined high limit value is set for the temperature and humidity, so that a push notification is received on a mobile device on which Blynk is running.
Experiment 2:
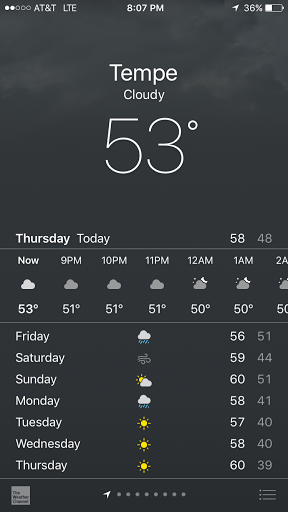
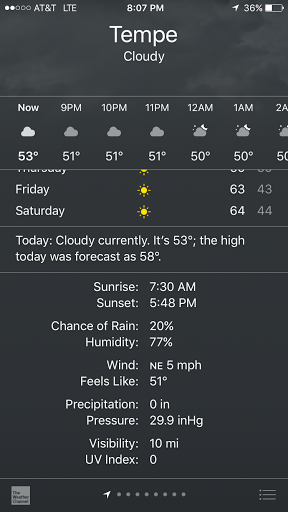
Another experiment is to set the sensor outdoors and measure the temperature and humidity and compare it against a weather application, such as The Weather Channel.
First the weather report was obtained from the weather application. At the time of experiment, the Temperature was 53 degrees fahrenheit, and the humidity was 77%. The sensor was placed in open air to sense the weather. After allowing a few minutes for the sensor to adjust to the temperature and humidity, the reading was quite close to the application temperature and humidity. The sensor read 77.5% humidity and 53.1 degrees fahrenheit to the Blynk application.