IoT Activities and Homework 1
by Max Yi Ren
Activity 1: Introduction to ESP8266 Thing
Also read: Hookup Guideline for ESP8266 Thing and Blynk
Item list
You will need the following during the class:
- The SparkFun ESP8266 Thing board
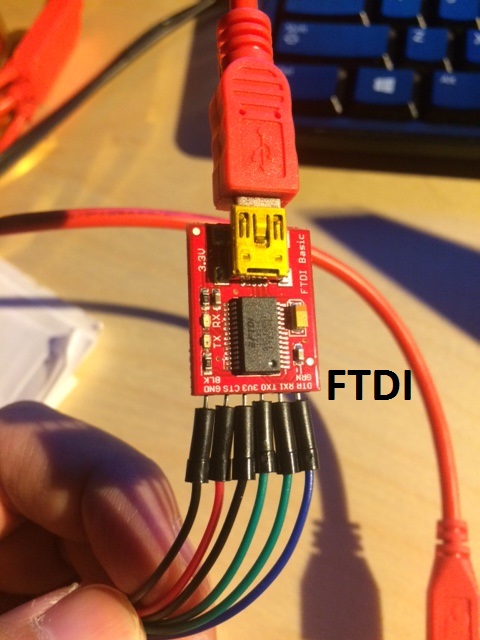
- FTDI Basic -3.3V
- SparkFun Cerberus USB Cable
- Jumper Wires and a Breadboard
- Arduino stackable header
- A Android/Apple smart phone and a computer.
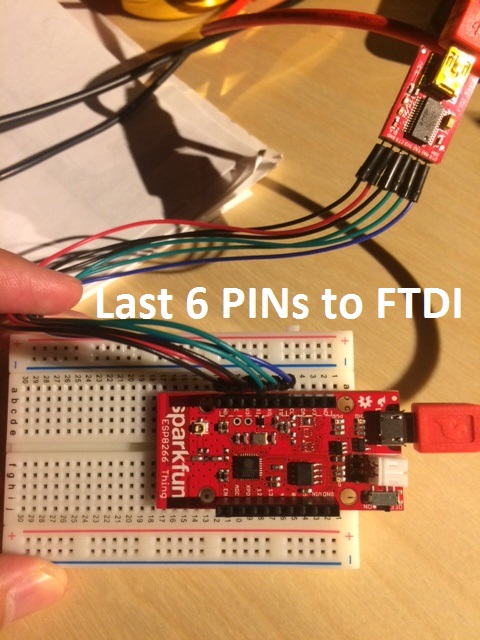
Hardware setup
To test the basic functionality, we will use the following hookup.
Software setup
The following setup should work for both Windows and Linux.
- Download the Arduino IDE and install. It’s free.
- Open the Arduino IDE. Install ESP8266 Arduino Addon:
- Go to File > Preference, type
http://arduino.esp8266.com/stable/package_esp8266com_index.jsoninto the “Additional Board Manager URLs” text box. Hit OK. - Then go to Tools > Boards > Boards Manager, search “esp8266”, and install it.
- Go to Tools > Boards, select “ESP8266 Thing”. If you don’t see it, close and reopen the IDE.
- Go to File > Preference, type
- On your smart phone, install “Blynk” and register. It’s free.
- Download the Blynk library. Unzip it and move it to %myDocuments%/Arduino/libraries (%myDocument% should be %your_user_name/documents% on Windows).
A simple test
We can now test a simplest functionality: Using Blynk to switch on the LED at Digital 5 on the Thing. To do so, create an Arduino sketch with the following code:
1
2
3
4
5
6
7
8
9
10
11
12
13
14
15
16
17
18
19
20
21
22
  #include <Wire.h>
  #include <ESP8266WiFi.h>
  #include <BlynkSimpleEsp8266.h>

  // You should get Auth Token in the Blynk App.
  // Go to the Project Settings (nut icon).
  char auth[] = "***"; // ***Type in your Blynk Token

  // Your WiFi credentials.
  // Set password to "" for open networks.
  char ssid[] = "***"; ***your wifi name
  char pass[] = "***"; ***and password

  void setup()
  {
    Blynk.begin(auth, ssid, pass);
  }

  void loop()
  {
    Blynk.run();
  }
Note that the campus wifi does not work for the Thing due to its security settings. You could, however, turn on hotspot on your phone and set up ssid and password from there. The Thing will then connect to your phone.
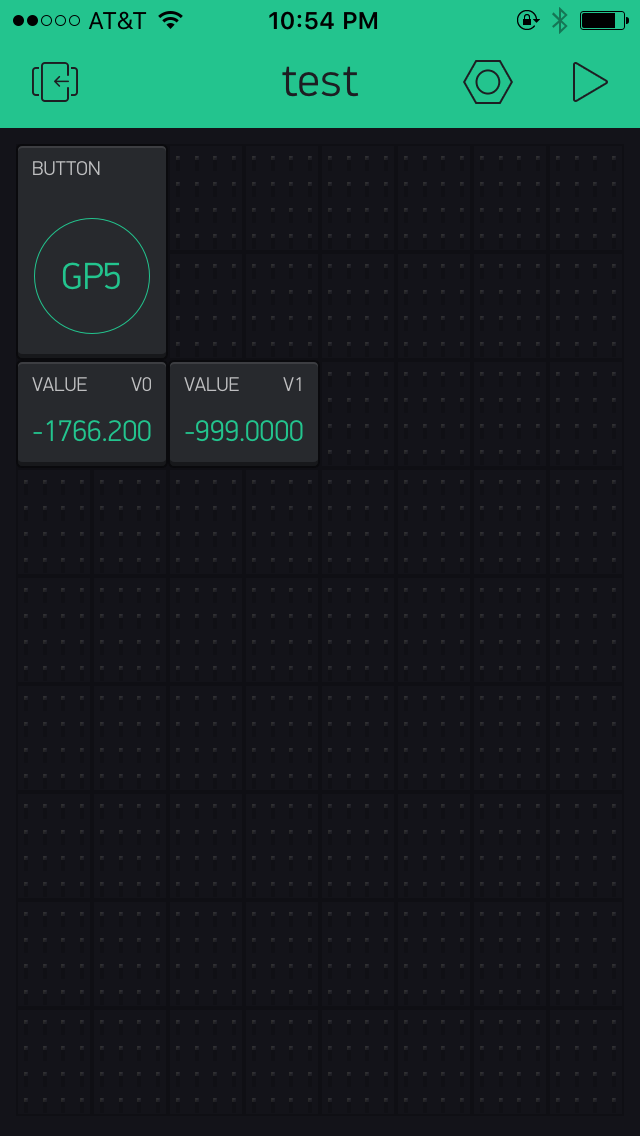
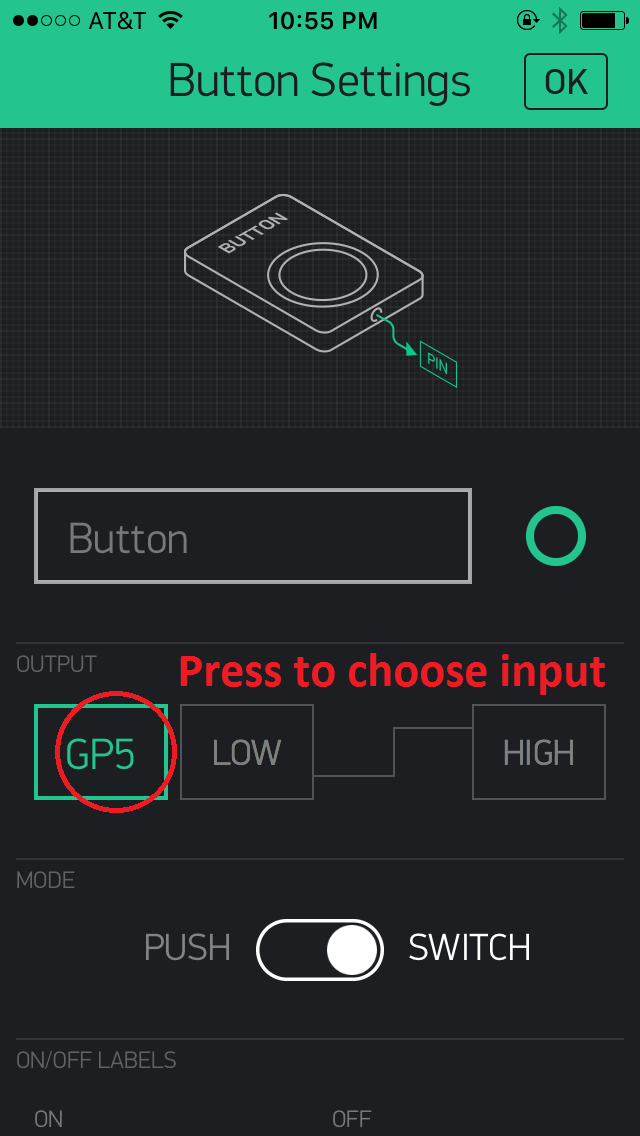
On Blynk, add a “Button” and link it to Digital 5.
Hint: If you encounter the error: “warning: espcomm_sync failed…”, there could be three reasons:
- Check if the Thing is turned on! The switch is on one corner of the board. You should see a red light on once the board is turned on.
-
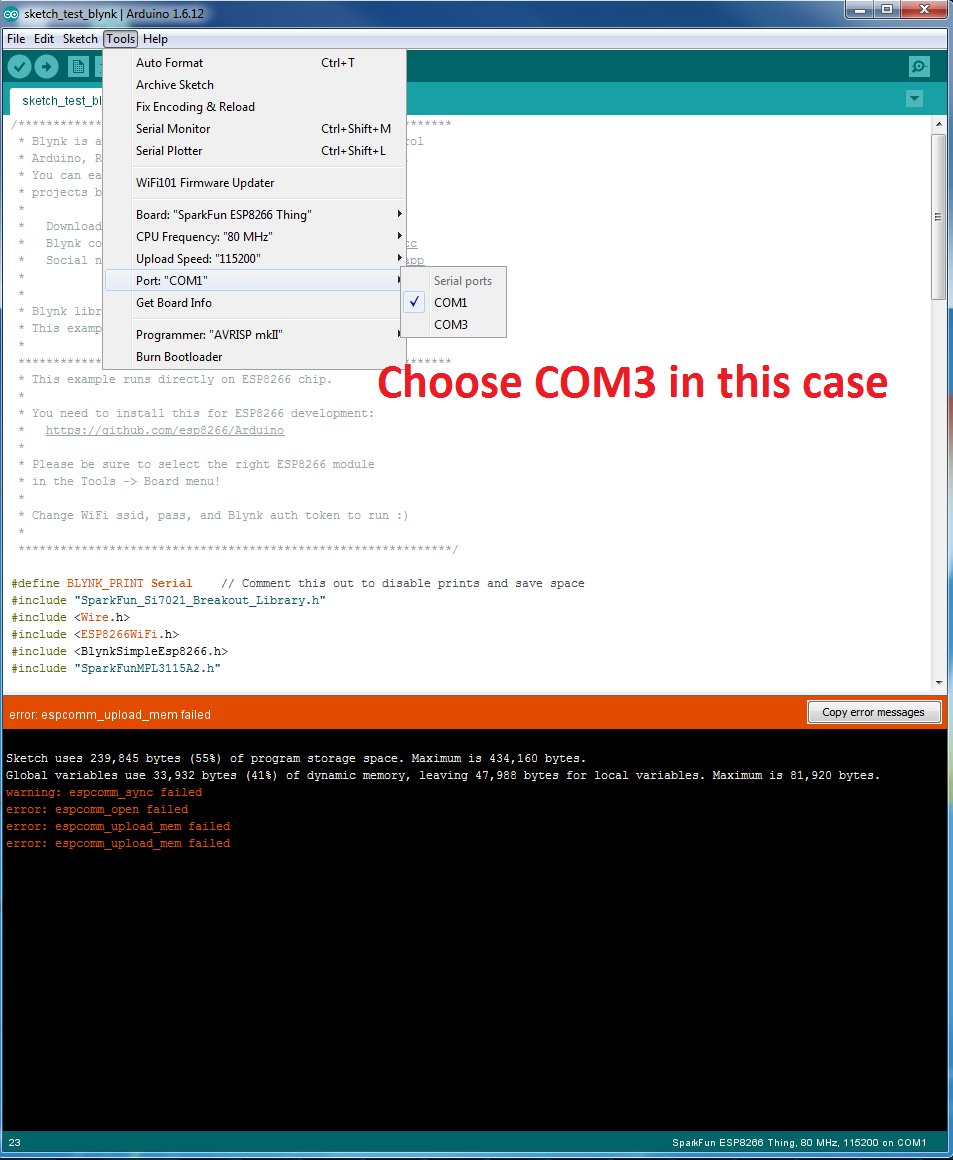
In the IDE, check Tools>Port to see which serial port you are using. Remember that both the Thing and the FTDI are hooked up through USB, the one we should use is the USB Serial Port rather than Communications Port. To find the right port, go to Device Manager (on Windows, it’s under Control Panel>System and Security>System) and check “Ports”. See figure below.
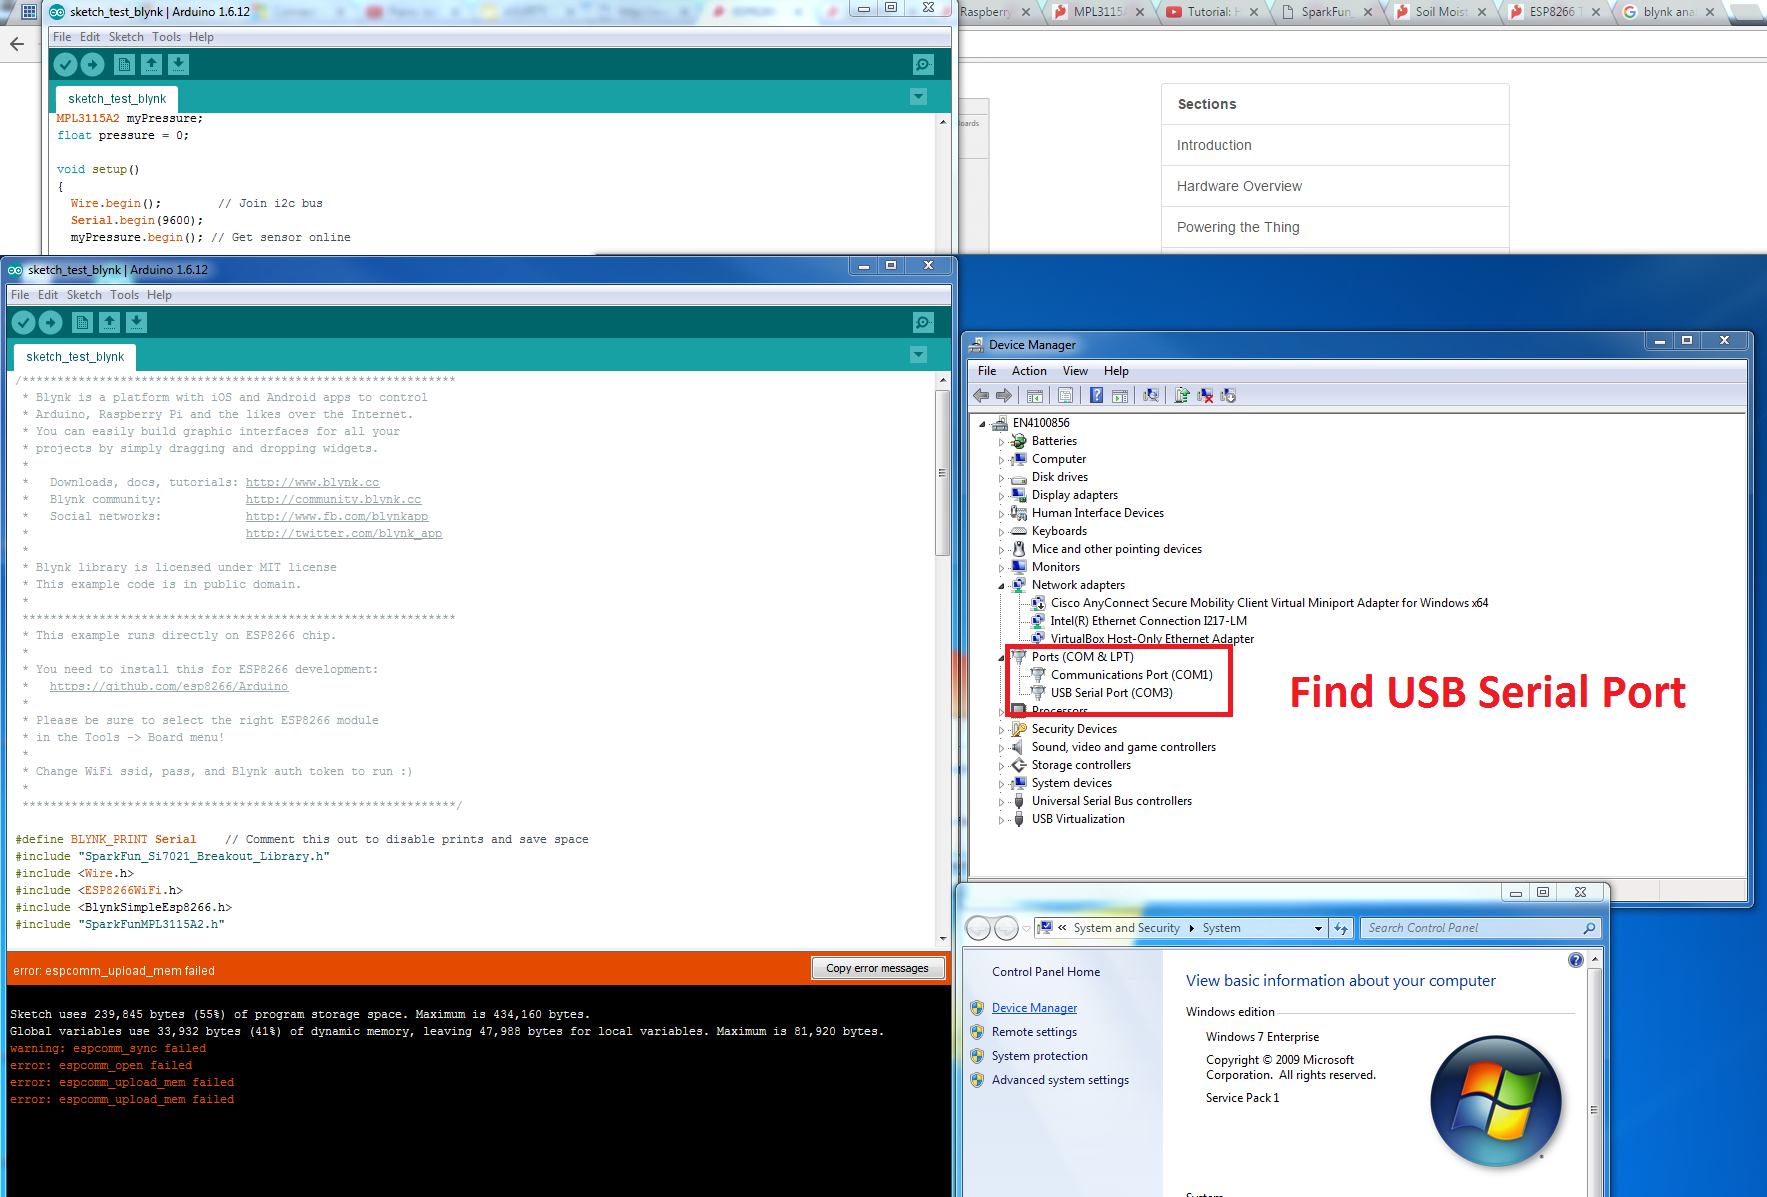
- It could be that your soldering is not well done.
In addition, sometimes this problem disappears when you re-upload, if your Port is chosen correctly.
Validation
Before you move forward, I strongly recommend you to go through the cases from the official guideline to see if your setup is all correct.
Activity 2: Test one sensor
Pick one sensor from the list. Follow the hookup guide of that particular sensor and report your results. Please also discuss potential applications of the sensor.
Homework 1: Prepare an application report for the chosen sensor
The report should contain the following elements:
-
A narrative of the application
-
An introduction to the sensor
-
A schematic of the hookup
-
The Arduino code and related installation guide of necessary packages
-
The experiment and discussion
Notes:
-
The report does not need to be long. But it should be informative so that others can reproduce your results by following your instruction.
-
Additional points You get an additional 10 points (out of 100) if your report follows the markdown format. See the markdown version of this file for example (click on the raw button). You may submit your images as a zip file if you do so. This allows me to easily publish your report online for others to see.
-
Submit your report to yiren@asu.edu with the exact title “MAE540 Homework 1 - Team number”. If you are submitting a non-markdown file, please make sure it is in pdf format.